
What this is
The guide for the laptop virtual care cart with patient facing HD camera: quick start, what's in the box, first-time setup, and your pathway to every guide for this station.
Who it's for
Anyone using this station, especially for the first time. Visionflex supplies the most feature-rich guide for each station family, so this guide may mention accessories your station does not include.
Quick start
|
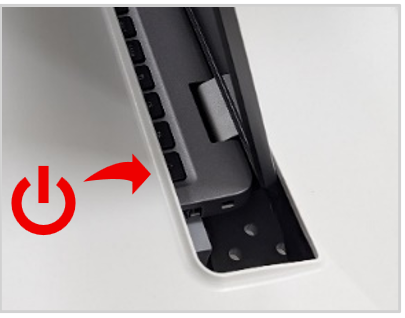
Turn on the laptop. Tilt the screen forward for easy access to the power button. |
 |
|
Open www.visionflex.com from the web browser and click Join meeting |
 |
|
Log in with your email address and click Sign in or Forgot password to reset it. From the Vision dashboard click Join Virtual Room to start a consultation. |
 |
|
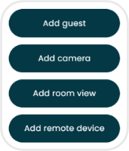
Click the + Add button in the toolbar and Add camera to bring the Patient camera into the call. You can also plug in and add the GEIS General Exam Camera if you aren’t intending to use the ProEX software for this session. |
  |
| When the clinician has joined, hover over their video feed and click to display them on the second monitor. |
 |
| Click … Examvu in the toolbar to start the ProEX clinical exam software and share it with the participants on the call. |  |
| Log in to ProEX with the Clinician account and open Exam Mode to capture clinical images from the cameras and vitals from the obs devices. You can export these to a PDF after saving against a patient. Click the tick box next to the session and Export to PDF. |  |
| For assistance, contact your IT, your digital health champion or Visionflex support. | |
 |
 After Sales and Technical Support |
User Guide
For your Virtual Care Station featuring:
- 15” Laptop on a Medical Cart
- ProEX Software
- Patient Facing HD Camera
- Patient Facing Monitor
What's in the box?
|
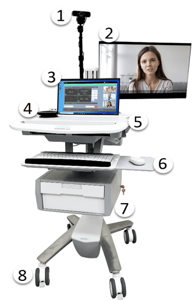 |
Ships with your selection of these clinical examination accessories: |
|
|
|
First time? Let's go!
Refer to the Unboxing and Assembly Guide for your cart here: visionflex.com/support
|
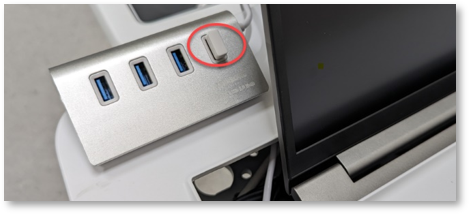
You have been provided with a wireless keyboard and mouse and Bluetooth® and USB peripherals. Take the USB dongle for the keyboard and mouse from the packaging and insert it into the USB Hub. |
 |
|
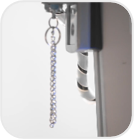
Connect the USB devices such as the Speakerphone and the General Exam camera to the USB Hub on the right side of the cart. Extend the Patient Facing Monitor arm by releasing the pull-down chain which is hanging from the hinge. |
 |
|
Tilt the screen forward to turn the laptop on. Click the Network / Wi-Fi icon on the bottom right of your screen to connect to the internet. Some organisations will require assistance from the IT department to connect to a network. |
|
Using your station
Everything below is shared across Visionflex stations and kept permanently up to date, so you are always reading current instructions. Open the guides that match the devices supplied with your station.
Vision calls
- Get started with Vision. Log in, accounts and your Virtual Meeting Room.
- Schedule a meeting. Send invitations for scheduled consultations.
- Set up for a consultation. Camera, microphone and permissions before a call.
- Virtual care call controls. Every button on the Vision toolbar.
- Use the patient facing monitor and camera. The swing arm, second monitor and camera controls.
- Work with clinical images in the gallery. Snapshots, telestration and sharing.
Clinical examinations
- Clinical examinations with ProEX. Start ProEX, log in and share it in a call.
- ProEX Exam Mode. Capture vitals and readings from your devices.
- Use clinical cameras in Exam Mode. Snapshots and video from cameras and scopes.
- Use your GEIS examination camera. Close-range imaging with clip-on accessories.
- Use your SyncVision otoscope. Ear, nose and throat examinations.
- Use your Besdata otoscope. Ear, nose and throat examinations.
- Use the handheld ECG. Capture a 30 second trace in Exam Mode.
- Stethoscope exams with TrueSteth. Heart and lung sounds for the far-end doctor.
- Patient data and PDF reports. Save sessions and export reports.
Your equipment
- Pre-session audio checklist. Confirm your sound is right before each call.
- Troubleshooting. Fix call, audio and camera issues.
Need help?
Call 02 8914 4000 | Email support@visionflex.com | Visit visionflex.com/support
Visionflex acknowledges the Traditional Custodians of Country throughout Australia and their continuing connection to land, sea and community. We pay our respects to Elders past and present.