
What this is
The guide for Visionflex virtual care mobile kits: quick start, setup, and your pathway to every guide for the software and devices in your kit.
Who it's for
Anyone using a virtual care mobile kit, or running Vision and ProEX on their own device rather than a cart.
Quick start
|
Turn on the tablet or computer. Open www.visionflex.com from the web browser and click Join meeting |
 |
|
Log in with your email address and click Sign in or Forgot password to reset it. From the Vision dashboard click Join Virtual Room to start a consultation. |
 |
|
Click the + Add button in the toolbar and Add camera to bring the Patient camera into the call. You can also plug in and add the GEIS General Exam Camera if you aren’t intending to use the ProEX software for this session. |
  |
| Click … Examvu in the toolbar to start the ProEX clinical exam software and share it with the participants on the call. |  |
| Log in to ProEX with the Clinician account and open Exam Mode to capture clinical images from the cameras and vitals from the obs devices. You can export these to a PDF after saving against a patient. Click the tick box next to the session and Export to PDF. |  |
| For assistance, contact your IT, your digital health champion or Visionflex support. | |
 |
 After Sales and Technical Support |
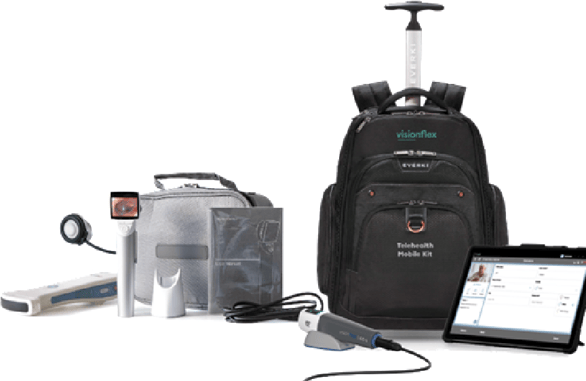
User Guide
Clinical virtual care using your tablet or PC with any combination of these clinical examination accessories:
|
|
First time? Let's go!
Your Virtual Care kit comes Bluetooth and USB peripherals. The devices should already be paired and ready for use. If not, please contact Visionflex support for assistance pairing them in Windows.
Click the Network / Wi-Fi icon on the bottom right of your screen to connect to the internet. Some organisations will require assistance from the IT department to connect to a network.
The Vision Virtual Care Platform
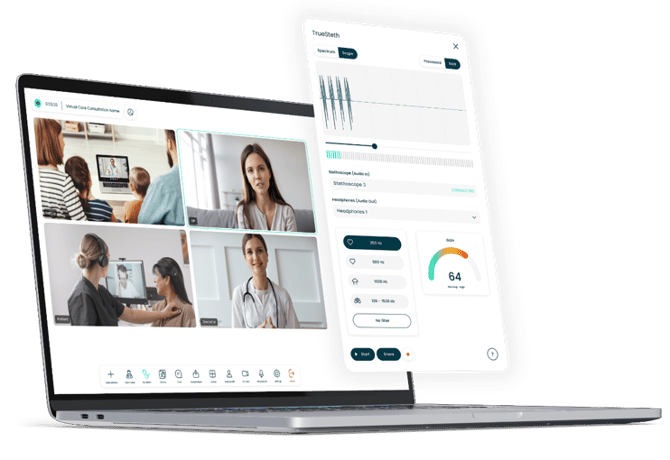
Vision allows healthcare professionals to conduct detailed clinical consultations with doctors and specialists wherever they are needed. The platform supports multiple medical devices simultaneously, enabling real-time results to be visible on-screen to all participants in a call. This data can be securely stored, shared, and integrated into patient records, enhancing remote patient outcomes and facilitating collaboration among healthcare teams.
|
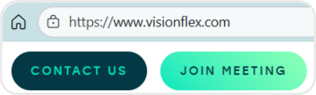
You can access the platform via the Visionflex website: www.visionflex.com Click Join Meeting, log in with your email address and click Sign in. |
 |
|
Don’t know if you have an account? Contact your virtual care champion. Or click Forgot Password? to receive an email with instructions for resetting your password. Visionflex support is here to help at visionflex.com/support call +61 2 8914 4000 or email support@visionflex.com Once logged in, admins can navigate to the Manage Users section to view all user accounts in your organisation. |
|
|
This is where admins can:
|
|
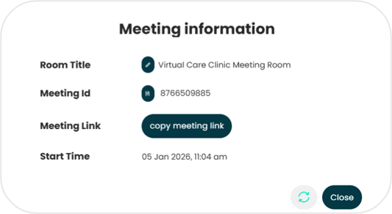
Using your Virtual Meeting RoomEach Vision account has its own Virtual Meeting Room (VMR) with a unique, permanent link and meeting ID, allowing participants to join repeatedly without a new link each time.
With on-demand accessibility, VMRs also allow you to initiate spontaneous or urgent consultations whenever they are needed. Guests don’t need any software or even a Vision account to join.
Click Join Virtual Meeting Room from the Vision dashboard to go straight into your VMR. You can then send an invite link directly to a participant’s email address by simply clicking + Add then Add Guest(s). |
|
|
Scheduling a Meeting using Vision
Specify the Title, and optional Description, Date, Time and, Duration. Add your account and any other Vision accounts as Registered Users Enter the email address of the Guests or remote participants. Press [Enter] after each email address. Tick Invite to Virtual Room to use the dedicated VMR Meeting ID. Click Book Meeting to send the invite.
From the invite summary page, you can:
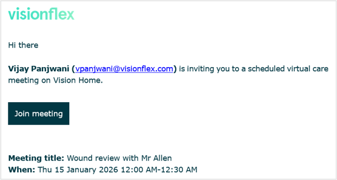
Recipients will receive an email invitation with a link to Join meeting. |
|
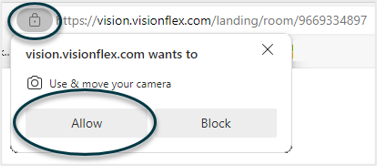
Conducting a Virtual Care ConsultationThe first time you join a Vision call you will need to allow the microphone and camera permissions. To troubleshoot browser permissions issues, you can click on the pad lock icon and open the permissions for this page settings to reset permissions. |
|
|
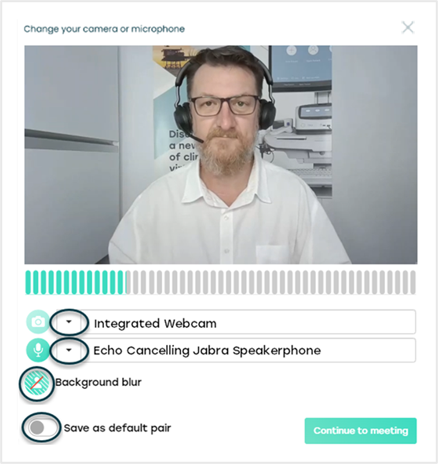
indicator move beneath your image. Select the front-facing integrated webcam and the jabra speakerphone as your video and audio inputs. If there is sensitive information visible behind you, consider using the background blur feature. You can set your camera and microphone pair to Ensure that your headset or speaker is active by right-clicking the volume icon near the system clock and opening sound settings. Your speaker will chime when you click the volume slider. Press continue to meeting to begin. |
|
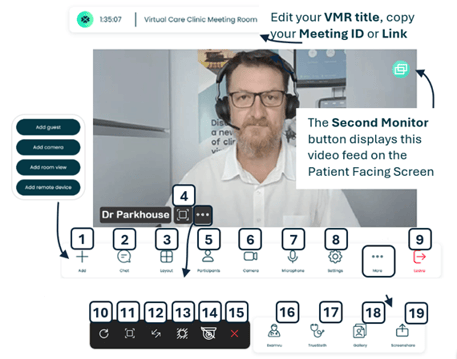
Virtual Care Call Controls
|
|
Working with Clinical Images and Collaborating in the Gallery
Click the snapshot button during a call to capture a temporary snapshot in the Media Library.
Here, you can view captured snapshots, whiteboards and uploaded files. Annotate and collaborate with other participants in the call to assist in the treatment of the patient.
|
|
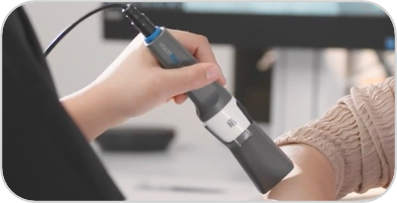
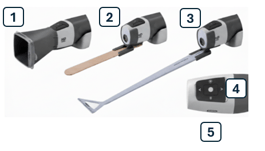
The GEIS General Exam CameraThe General Exam Camera is designed for close-range imaging and has powerful LED illumination for consistent image colour and tone.
It comes with clip-on accessories for different functions.
|
|
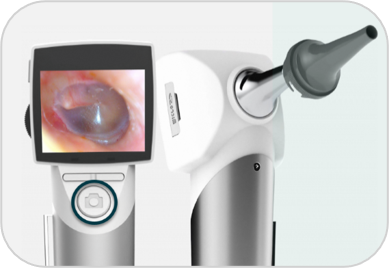
The SyncVision OtoscopeThe digital otoscope simplifies ear, nose and throat examinations.
Connect the USB-C cable to the Otoscope handle, then press the round camera button on the device to select “PC Cam”. The dial on the side of the screen adjusts the light-throw distance for ear canal or ear drum examination. |
|
Conducting a Stethoscope Exam with TrueStethTrueSteth allows the transmission of heart, lung, and body sounds from a Digital Stethoscope over a virtual care call. The remote physician can control the filters and the gain of the stethoscope to assist with diagnosis.
To carry out a TrueSteth examination, first connect the digital stethoscope via USB. The Stethoscope is seen by Windows as a Microphone. Check the Audio Settings by right-clicking the Windows volume icon and opening Sound Settings to ensure that the volume of the ri-sonic PCP-USB Stethoscope set to around 80%.
Select your headphones by clicking the ^ up arrow next Preview and select the Headphones device.
|
|
Need help?For assistance, contact your IT, your digital health champion or Visionflex support. |
|


 Invitations can be sent for scheduled meetings by clicking New meeting from the dashboard.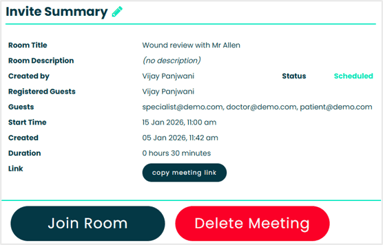

 Access the gallery from the toolbar by clicking More … and then selecting Gallery.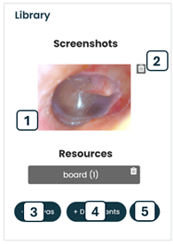

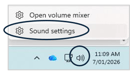 Audio settings guide: Use the
  Your Stethoscope came with ‘over ear’ headphones to get the best audio quality during the stethoscope examination. If headphones are not used, feedback can be an issue, and some audio indicators will be difficult to detect. Turn them on by pressing the centre button of the 3 raised buttons on the headphones.
 TrueSteth is accessed via the Vision toolbar.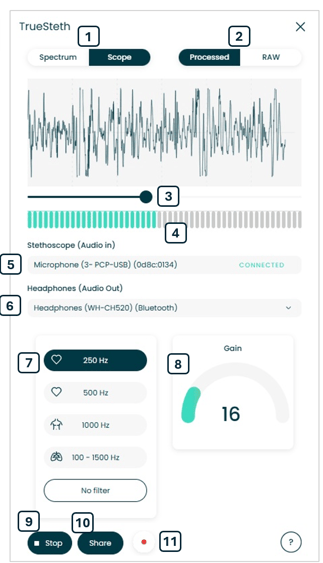

Using your station
Everything below is shared across Visionflex stations and kept permanently up to date, so you are always reading current instructions. Open the guides that match the devices supplied with your station.
Vision calls
- Get started with Vision. Log in, accounts and your Virtual Meeting Room.
- Schedule a meeting. Send invitations for scheduled consultations.
- Set up for a consultation. Camera, microphone and permissions before a call.
- Virtual care call controls. Every button on the Vision toolbar.
- Work with clinical images in the gallery. Snapshots, telestration and sharing.
Clinical examinations
- Clinical examinations with ProEX. Start ProEX, log in and share it in a call.
- ProEX Exam Mode. Capture vitals and readings from your devices.
- Use clinical cameras in Exam Mode. Snapshots and video from cameras and scopes.
- Use your GEIS examination camera. Close-range imaging with clip-on accessories.
- Use your SyncVision otoscope. Ear, nose and throat examinations.
- Use your Besdata otoscope. Ear, nose and throat examinations.
- Use the handheld ECG. Capture a 30 second trace in Exam Mode.
- Stethoscope exams with TrueSteth. Heart and lung sounds for the far-end doctor.
- Patient data and PDF reports. Save sessions and export reports.
Your equipment
- Pre-session audio checklist. Confirm your sound is right before each call.
- Troubleshooting. Fix call, audio and camera issues.
Need help?
Call 02 8914 4000 | Email support@visionflex.com | Visit visionflex.com/support
Visionflex acknowledges the Traditional Custodians of Country throughout Australia and their continuing connection to land, sea and community. We pay our respects to Elders past and present.